Symptoms show battery in EasyTek 2 not holding a charge. Tried other charging cord and cable but did not help. User manual says it contains a rechargable battery that can be replaced by a qualified technician using special tools. Local Signia dealers here in Tucson say they cannot rdo any repairs and i need to buy a new one Where can i get that service performed. I am willing to mail it in for sevice.
Do you have a Battery’s Plus or other place in town that specializes in batteries and cellphone repair? They might give it a shot.
I wonder if Lloyd’s would do it?
Have you found a solution?
Regards
1 Like
I have a Smart Connexx / Easy Tek audio streamer and I got the same answer w.r.t. replacing the battery. Has anyone found a fix other than replacement of the streamer? I am ready to break it open somehow and see what kind of battery is inside.
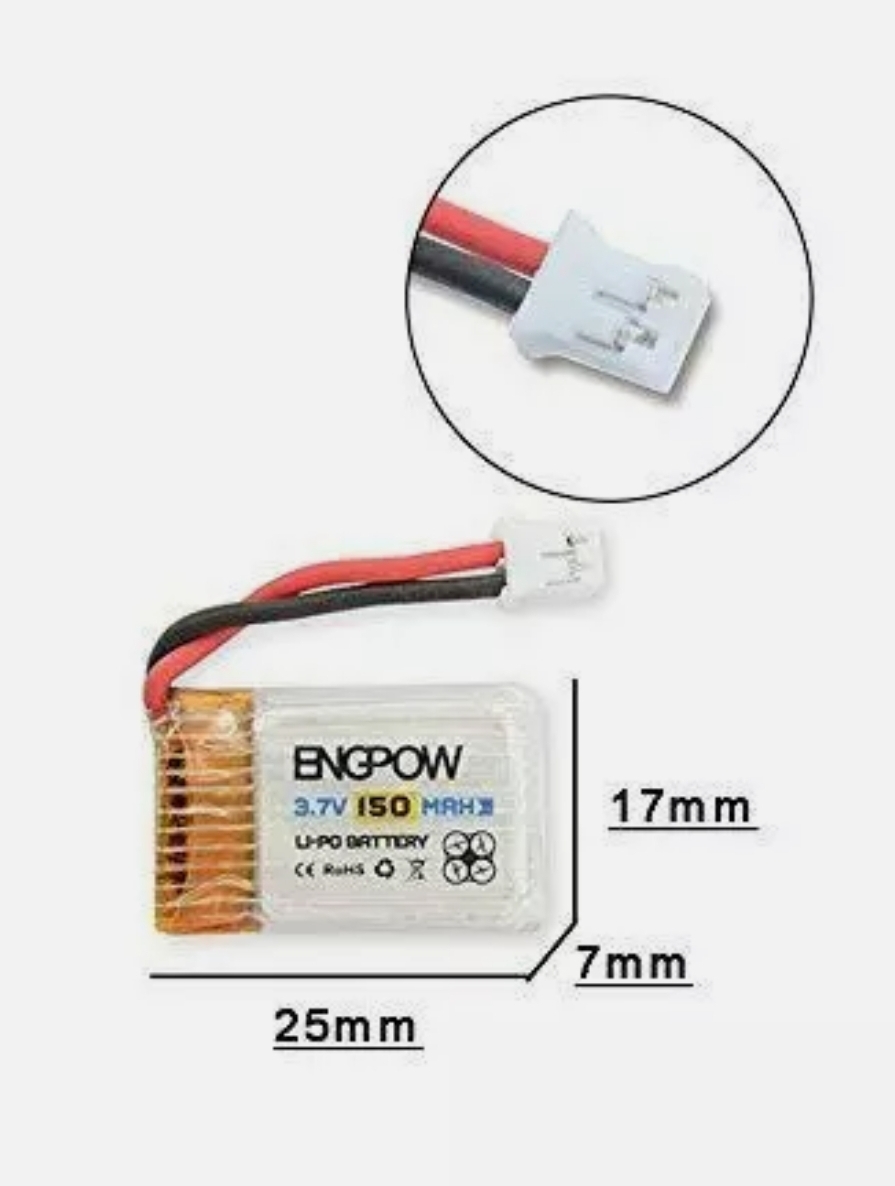
You can get them pretty easily from ebay, it’s a standard 3.7v 150mha. Not sure on the size exactly but, something like these should work fine.
Thank-you so much. How did you open your Connexx?
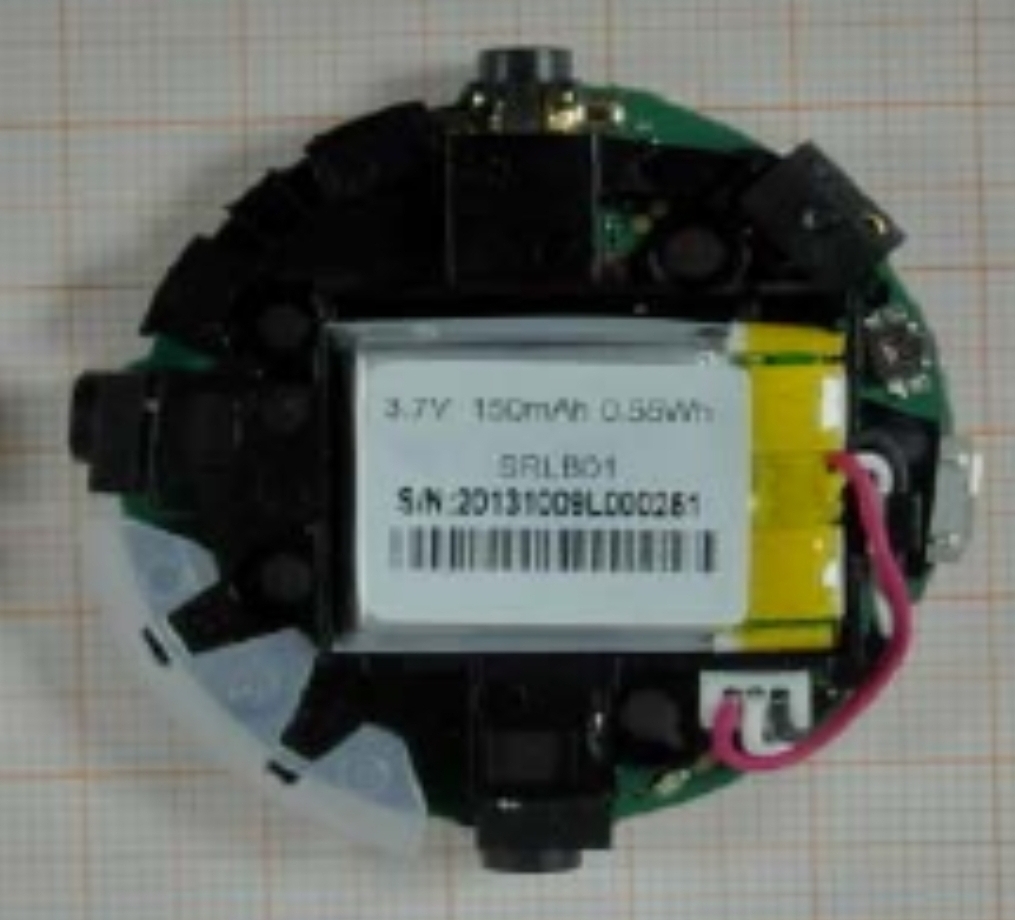
Actually its quite easy, just pop the back cover off and this will expose 4 x screws.
As a side note you’ll need to keep the circuit board and 3pin plug,so you can use it on the new one, as I couldn’t find a 3pin small enough to fit.

Great subject as there’s not much information online regarding this…
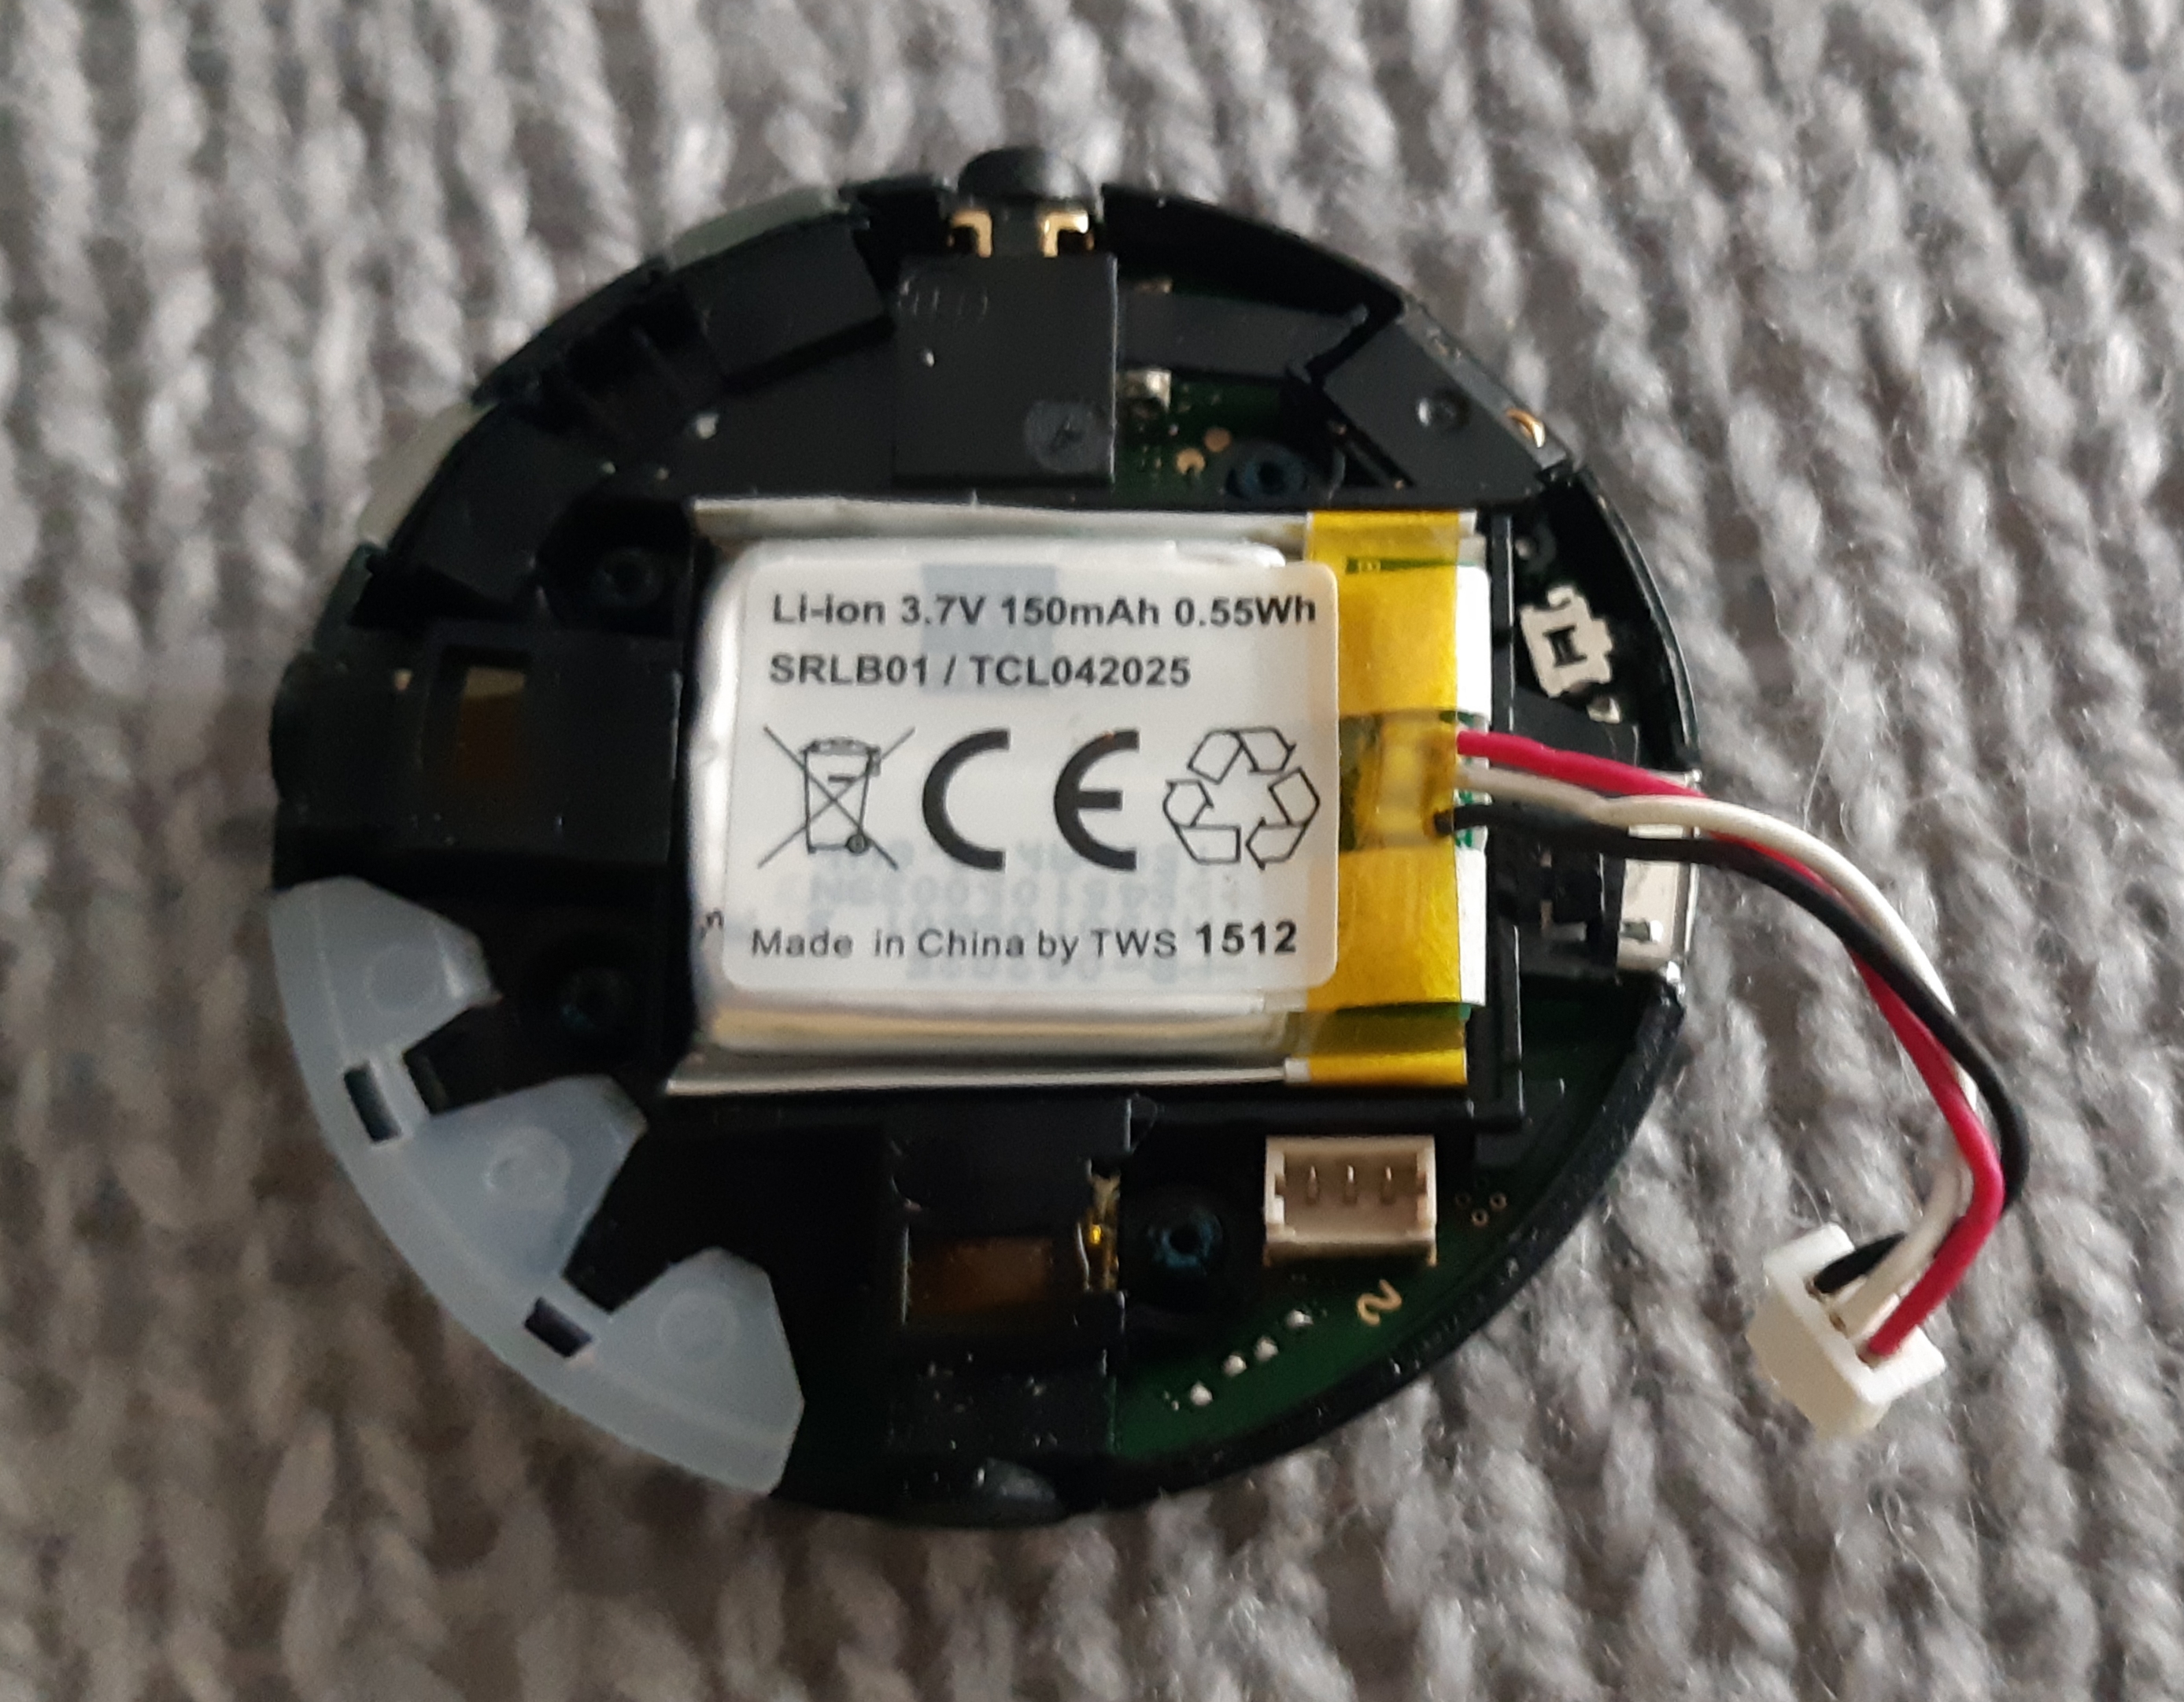
The battery inside the EasyTek unit is a 3 core (purple/red, black and white) and can only find the batteries with 2 core (red and black).
Whats the 3rd cable for?
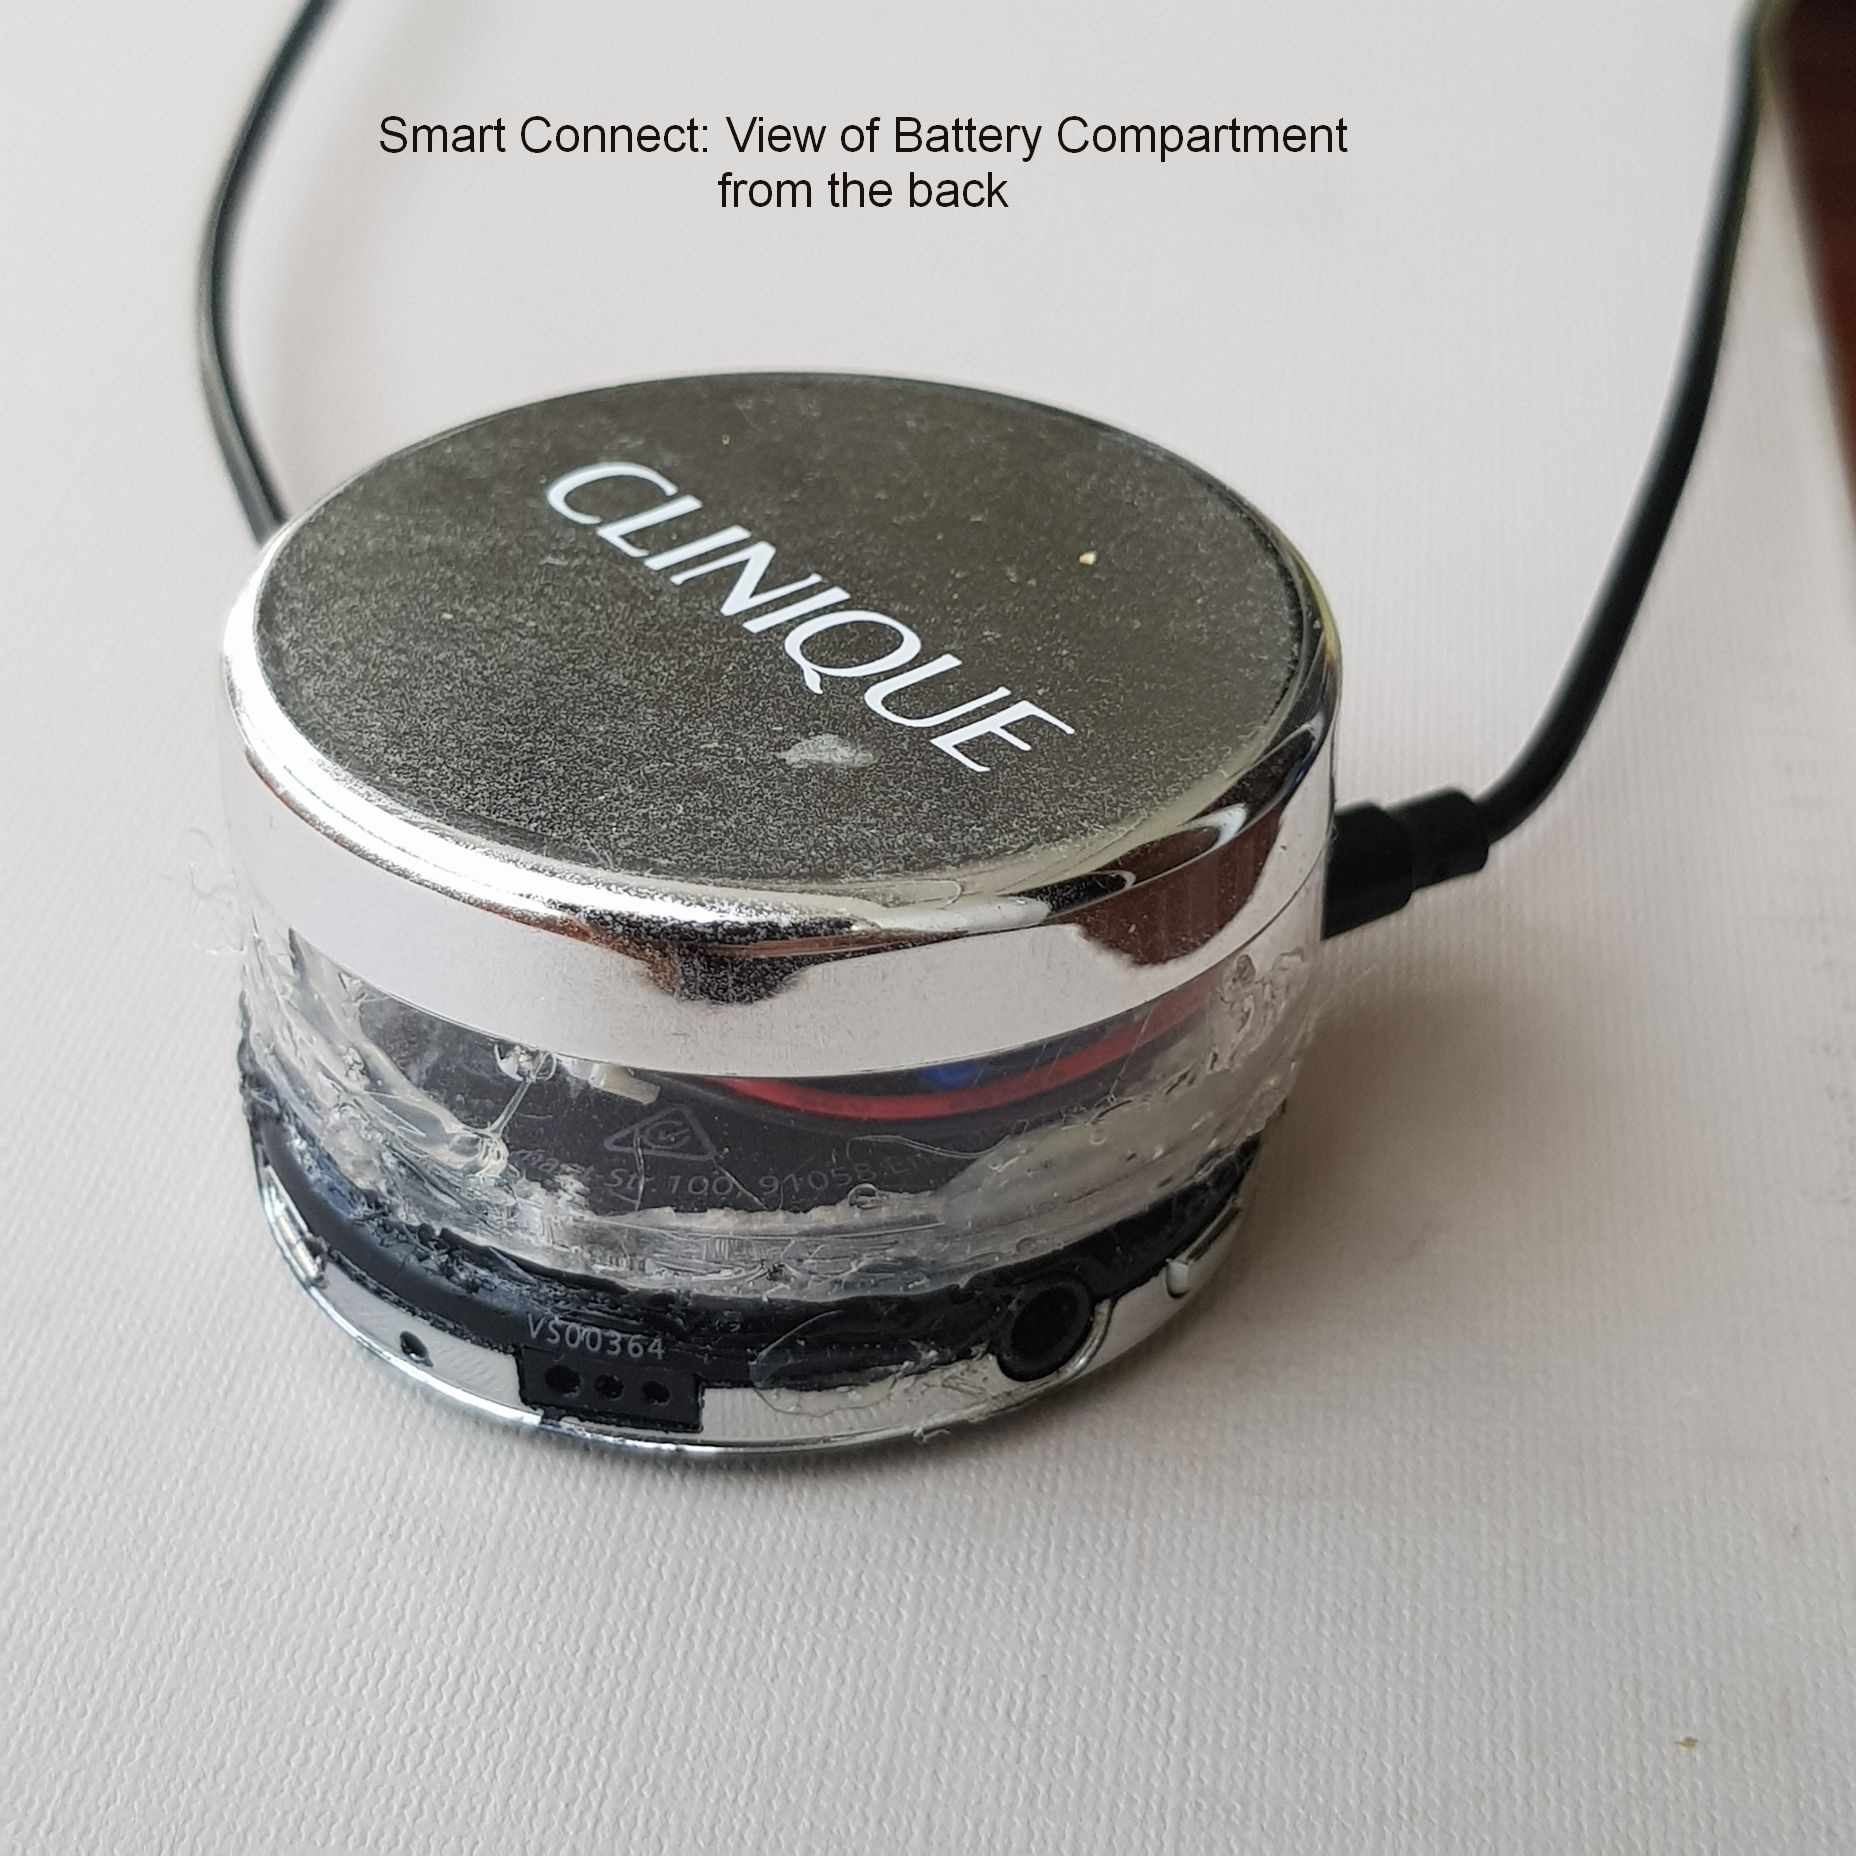
Easytek battery replacement corrected version. Also, for Smart Connect from the same manufacturer that supplied Siemens.
The third cable (the white wire) is for regulating the recharging of the battery, really only needed for multiple-battery setups, 2 X 3.7 V = 7.4 V, and multiples 3x, 4x, etc.
For a single cell (3.7 V) setup the white wired is used only to comply with an EU manufacturing regulation, but does not apply to private personal use. However, the method described below is SAFE ONLY for 3.7 volt single cells.
To get the device to work with a two-wire battery a low-wattage 10K resistor is needed. *
One end of the resistor is soldered to the white connector wire and the other end to the black connector wire. The BLACK and RED wires connect to the battery. **
The resistor I used was about 3/16 inch long and 1/16 inch thick. (5 mm long x 2 mm thick, with wires from both ends each about one inch (25 mm long.)
** Polarity is a problem, So be sure to test to make sure everything works before reassembly.
Soldering
To reduce re-soldering, I did not solder the battery wires directly to the red and black wire from the device. After installing the resistor, I used a 2-pin female connector from the device and a 2-pin male connector from the battery. This means the battery can be plugged and unplugged from the device.
I found that my first wiring attempt did not work. Then I connected the black wire from the device to the red wire from the battery. And red wire to the black wire. (This may be because the battery I got from China was not wired correctly.)
If you get the polarity wrong at the first attempt, just cross the wires as I did. You will not destroy anything by hooking up wrong. Only if you short-circuit. I used heat shrink tubing to avoid short circuits.
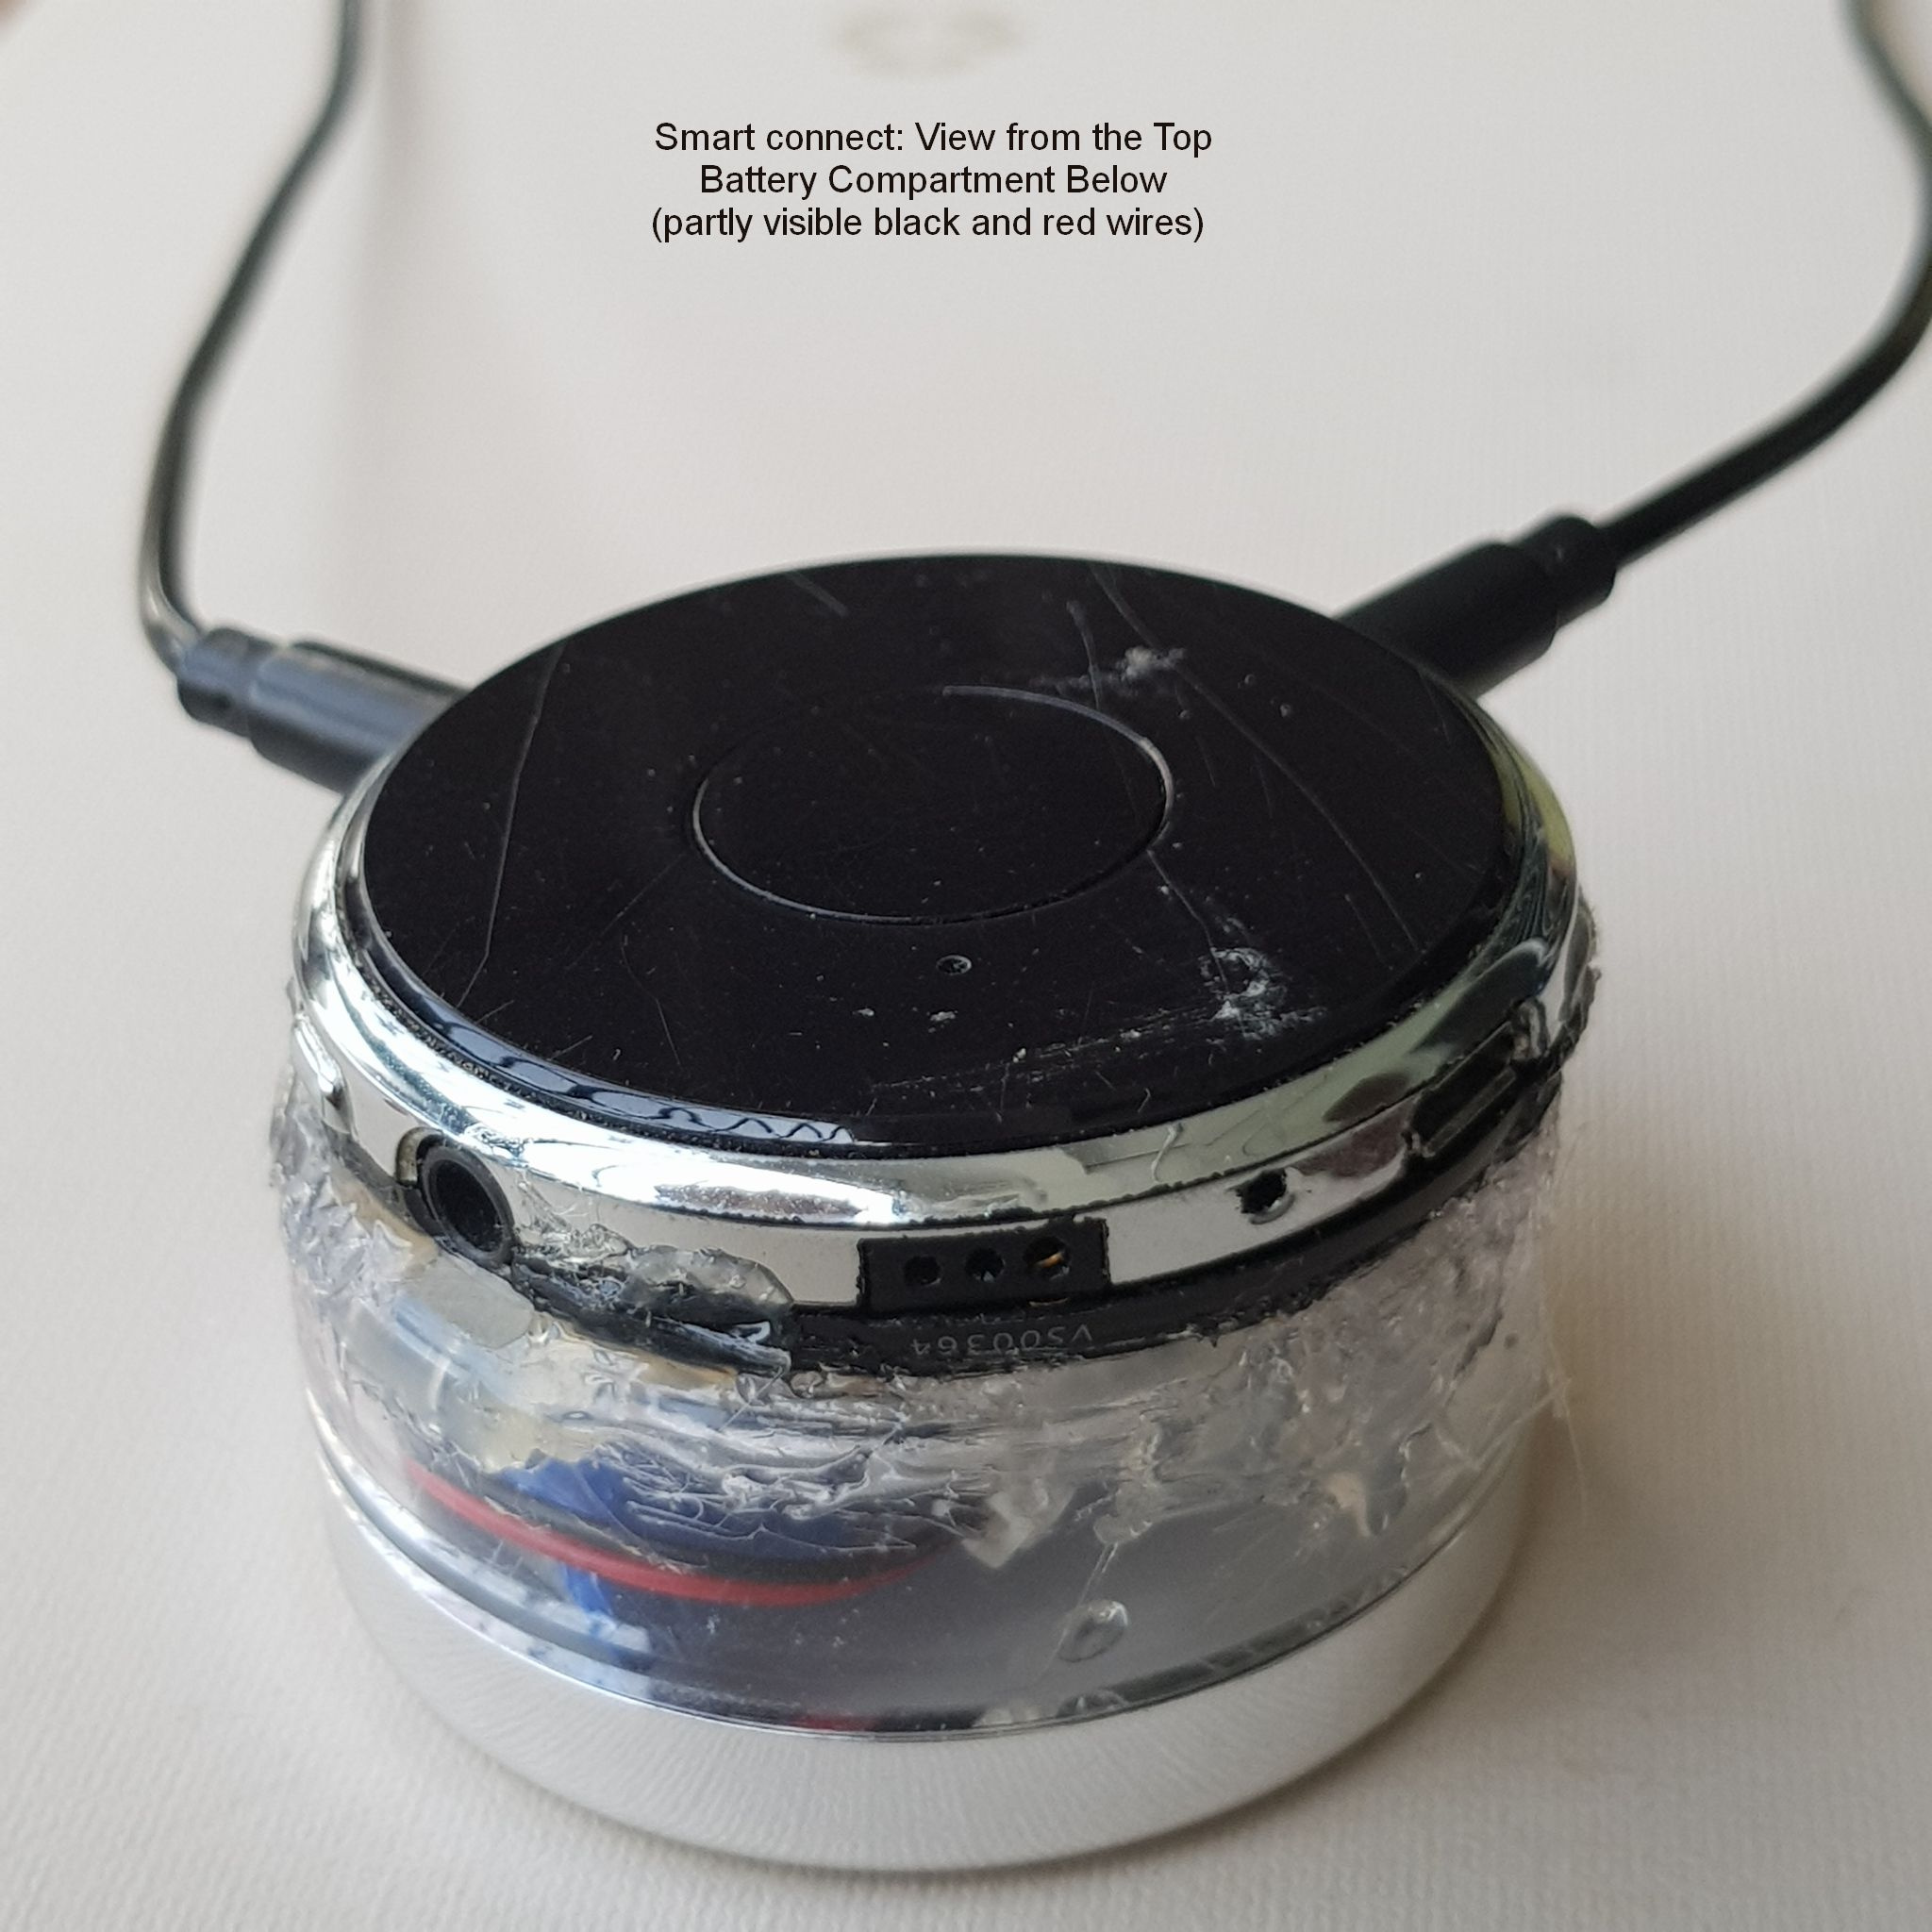
With all this wire there was NOT enough space inside the case. To expand the space, I piggy-backed a battery compartment onto the back of the device. That means I needed to drill a hole in the back of the device to allow the connector to extend out the back.
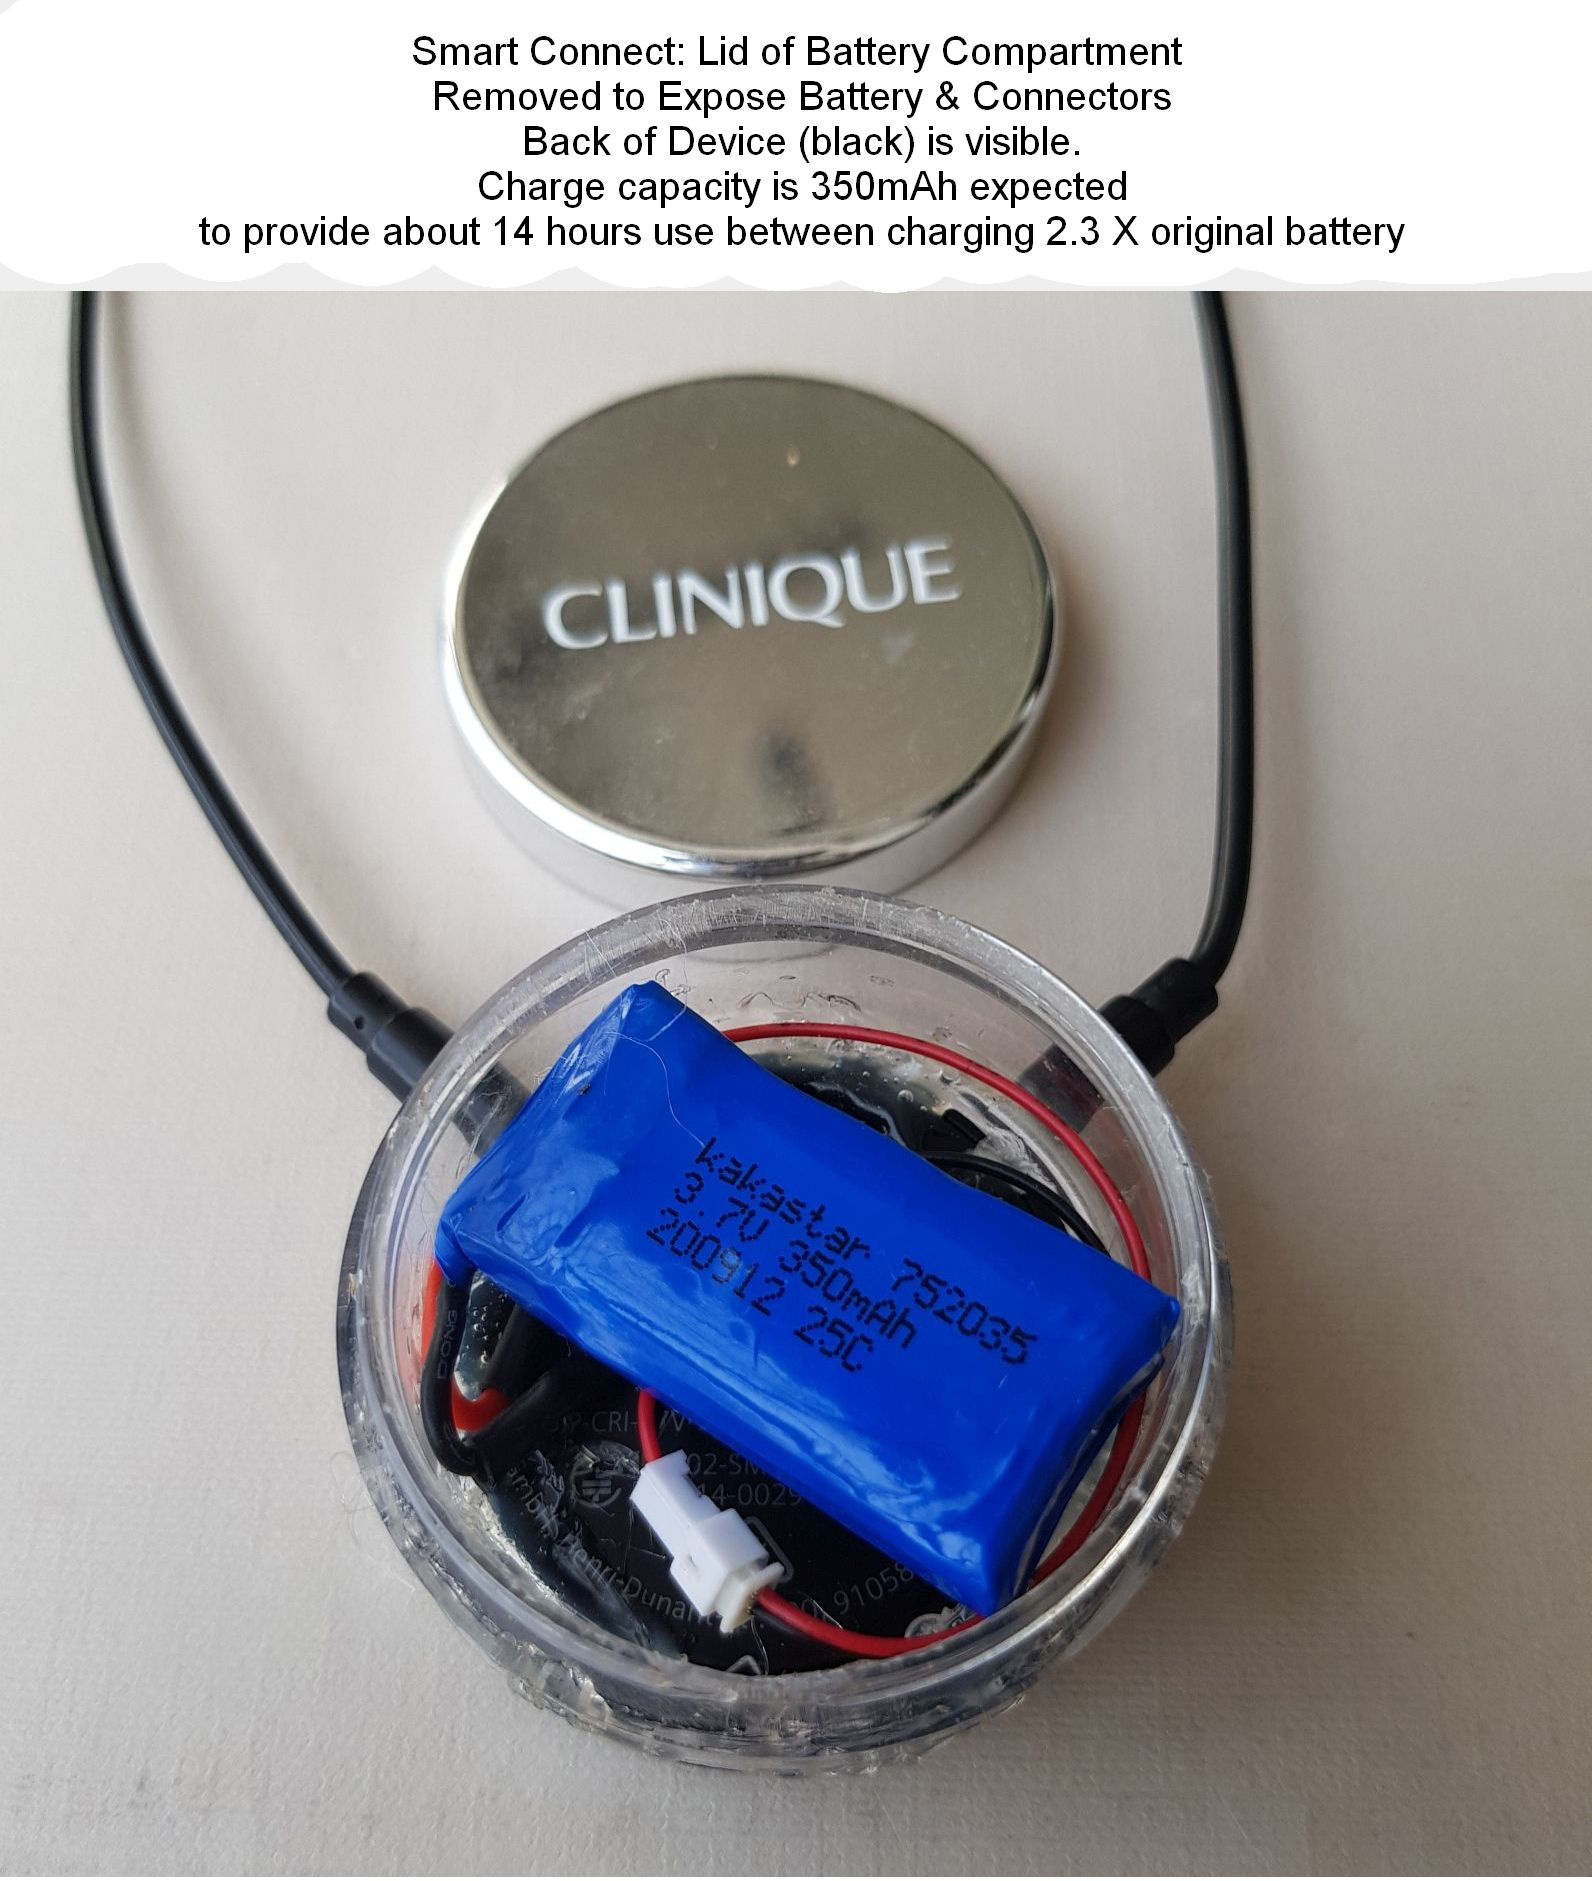
For the battery compartment used a small plastic cosmetic jar 2 inches (50 mm) in diameter and about 0.4 in (10 mm) deep. (A cosmetic sample my wife got free.)
I cut a hole in the bottom of the cosmetic container just under 2 inches (about 40 mm) to leave a narrow lip inside.
Then I reassembled the device (after testing it.) And used a glue gun to fasten the cosmetic container to the back of the device.
I connected the battery and placed it inside the cosmetic container and screwed on the top.
Voilà!
Now to change the battery I unscrew the top of the cosmetic container, unplug the old battery and plug in a new battery to the connector that protrudes out the back of the device, a 2 minute job. I save about US$100 each time I replace the battery instead of replacing the device.
True, the device with external battery compartment is 0.4 inches (10 mm) thicker) but hardly noticeable and easily hidden inside a shirt or blouse.
Where I live Siemens no longer supplies Easytek, so I now use my old Easytek with external battery compartment and a new Smart Connect with my two Siemens Signia hearing aids,
Signia is the best ever hearing device among the 10 other brands I tried. I am functionally deaf, but even so, Signia gets the job done well enough for me to work in a team environment.
Cheers, Fred Badger
2 Likes
I have a Smart Connect from the same company that supplied Easytek. Today, I pried off the back cover and tried to undo the 4 screws with a Philips screwdriver. No luck. Then I used a powerful magnifying glass and discovered the screws have 6 corners, like the Star of David. I tried several tiny slot screwdrivers and finally found one that turned the screws.
Torx screws. Yes, they use special bits.
Raudrive, thanks for this. Never saw them before. Torx screws can be turned with the right size slot screwdriver. Took a little experimentation to find the right one from my set.
Yes, I have done that too.
Get yourself a set of torx drivers, so much easier.
Today I successfully completed fitting external battery compartment to the Smart Connect device that works the same way as the Easytek. No polarity problem and no need to cross the red and white wires because the battery was wired correctly.
My hands are no longer steady. So when I used the hot glue gun to attach the battery compartment, I made a bit of a mess. Not to worry because I will wear it under my shirt.
I have now made this modification of both the Easytek and the Smart Connect devices.
Tools cost about US$125 and batteries about US$25. Devices about $200. So I saved $250. ($400-$150). I am about to replace the Easytek battery the second time and will save $190 for less than 20 minutes work. Every year that I replace batteries, I expect to save $380.
1 Like
Thanks for details.
It will take some effort to digest and see whether I can somehow replace it.
I want to buy the newest Signia equipment (hearing aids with all accessories) but in my country they sell about 2 years older models, so I kinda try to fight the relevant authorities in my country to see whether it will be possible to but the newest.
Meanwhile I’m stuck with the current equipment which includes the EasyTek whose battery is very short not allowing me to work properly and they only solution is to buy a new EasyTek, which is a useless equipment for new hearing aids modules which I may buy in future.
I managed to find a 3 wire battery, but it is very slightly bigger (and larger capacity) than the original. Got it from Ebay Pardon our interruption... The seller is eBay Home
Because the battery is slightly bigger, it wouldn’t fit in the case, so I designed an extra case to glue onto the back of the original unit, and my son 3D printed it. I fitted it today, and it works perfectly. If anybody would like the .stl file to 3D print, I will gladly send you a copy.
3 Likes