As promised @raylock1 ! Here’s the saga of my Roger Ons with the busted switches.
I bought two Roger On iNs (v1) from two different eBay sellers for less than $100 each. They were sold for parts/as is, but each seller said they powered on and they just didn’t have the equipment or know-how to test them. Some of the ones pictured looked new, with the clear sticker still on the screen. They were all dark gray, the less common color, so I figured the sellers had gotten several cases of them God knows where and didn’t even know what they had. I thought there was a good chance they’d have licenses in them, since they didn’t appear to have ever been used. At that price, I rolled the dice and bought the first one.
It worked great at first. Then, after a few days’ use (and being knocked around in my bag), it started refusing to turn off. Sometimes it would turn off briefly, then randomly turn back on after several seconds or minutes. Other times, moving the switch to ‘off’ had no effect at all. Sometimes, when I kept the switch set to ‘off,’ it would restart every few seconds for hours at a time. All I could do was disconnect it from my hearing aids and let the battery run out.
I figured ‘Win some, lose some,’ and reasoned that it was worth what I paid just for the licenses it came with. I bought another cheap one from the second seller, and the same thing happened: it worked great for a few days, then refused to turn off. Time for Plan B, which was a DIY repair. I was much more willing to experiment than I would have been if I’d paid full retail. So here’s the illustrated guide to what I did:
Here’s what the back of the device looks like. There are six rubber plugs covering six T3 screws. The plugs are removed in this pic, but you see where they were. Once I figured out what they were, I pried them out by stabbing them with a sewing needle.
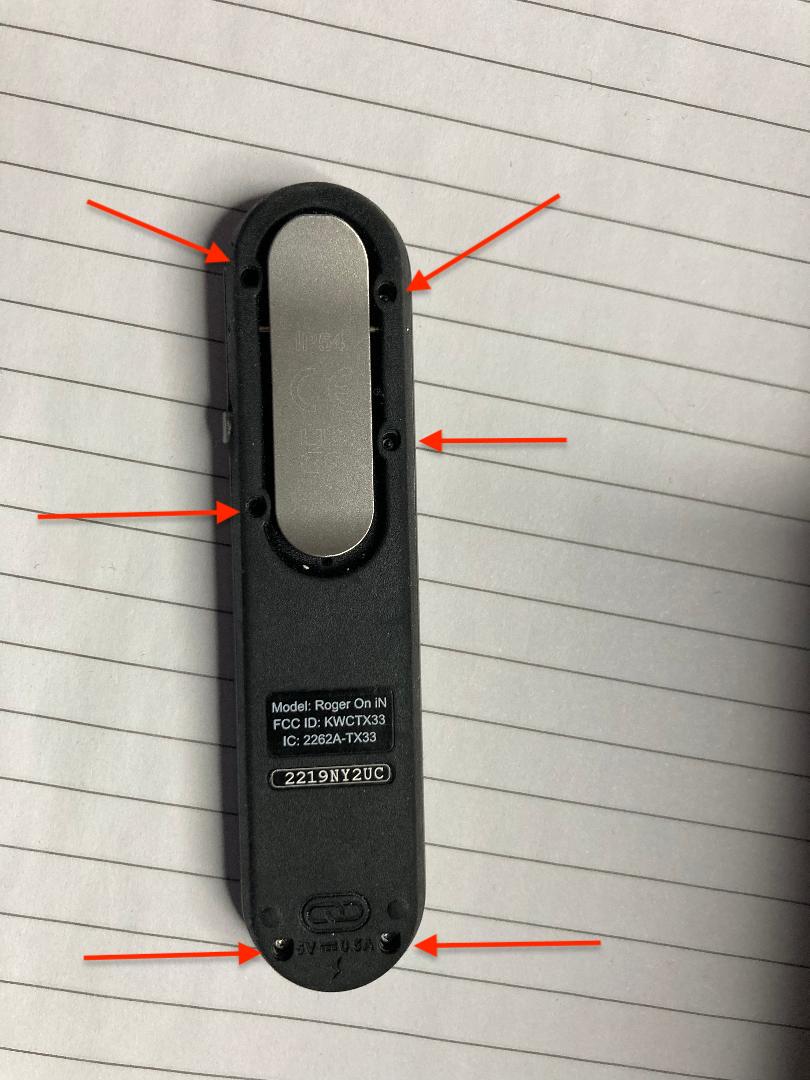
The screws are tiny, so I suggest sticking them to a magnet as you take them out so they don’t disappear. You’ll probably have to do some prying and jiggling to get the back panel off. Be careful that the external switch doesn’t go flying off somewhere.
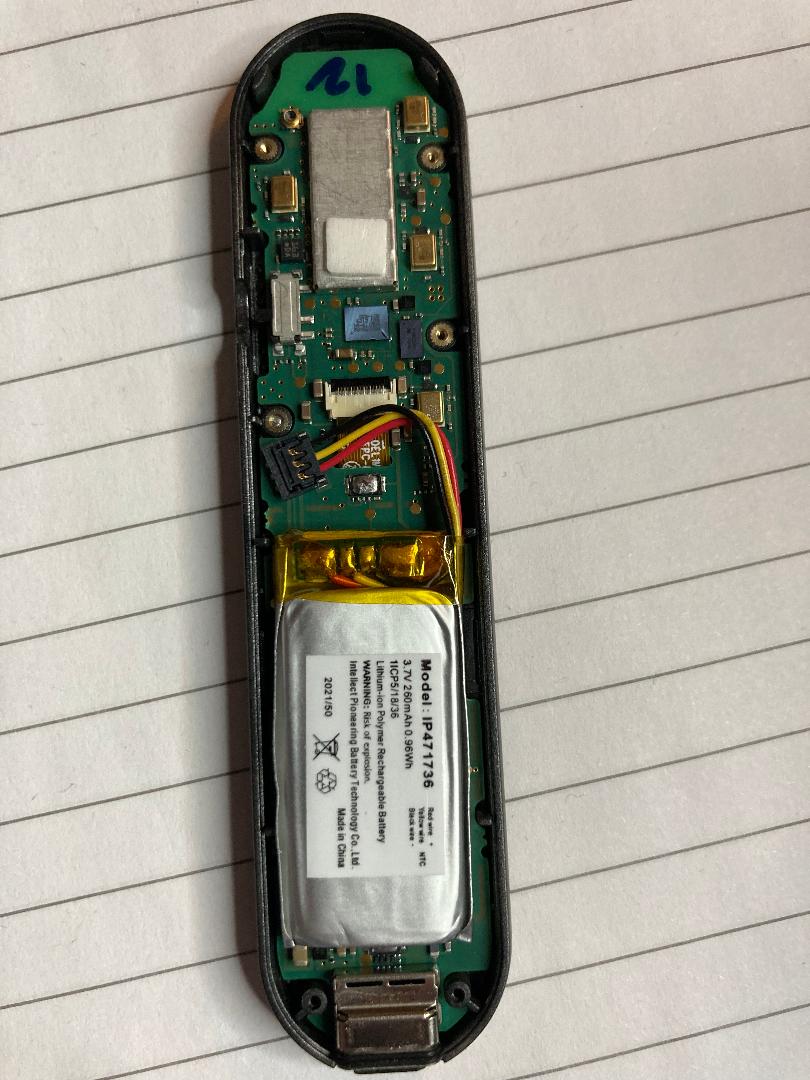
Also, be very careful not to disturb the center button. If knocked out of place, getting it aligned again so it works when reassembled is a huge pain. It will look and feel like it’s lined up right, but once you get everything screwed back together, you won’t be able to make it click anymore unless it’s lined up just so. I suggest preemptively securing it to the front panel with a piece of tape.
Here’s what it looks like with the back panel removed.
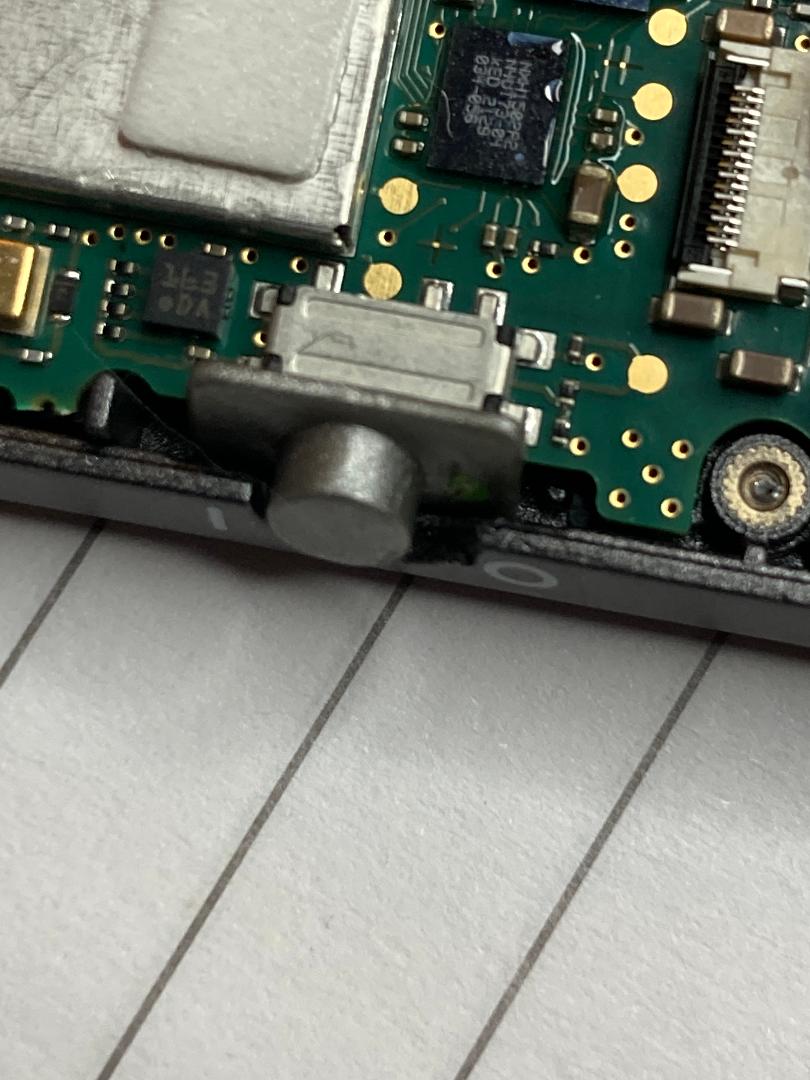
Here’s what the external switch looks like when it’s where it’s supposed to be. Pay attention to the orientation. The side with the green dot goes by the O marking, not the | marking.
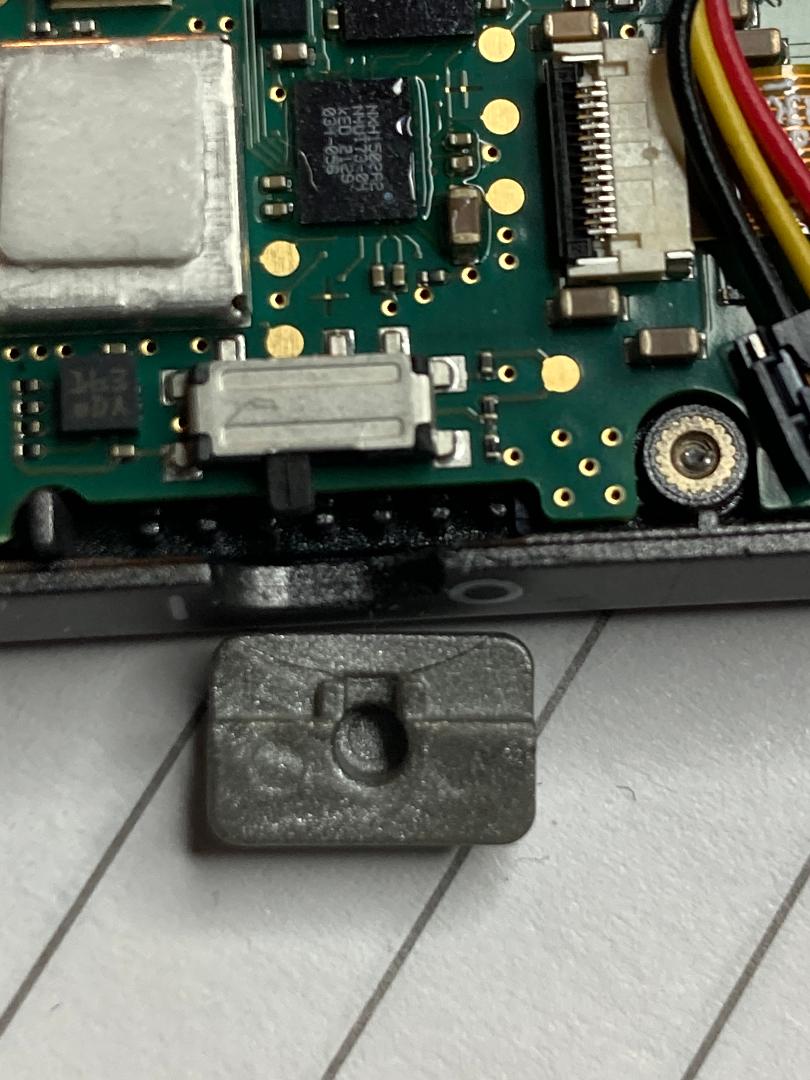
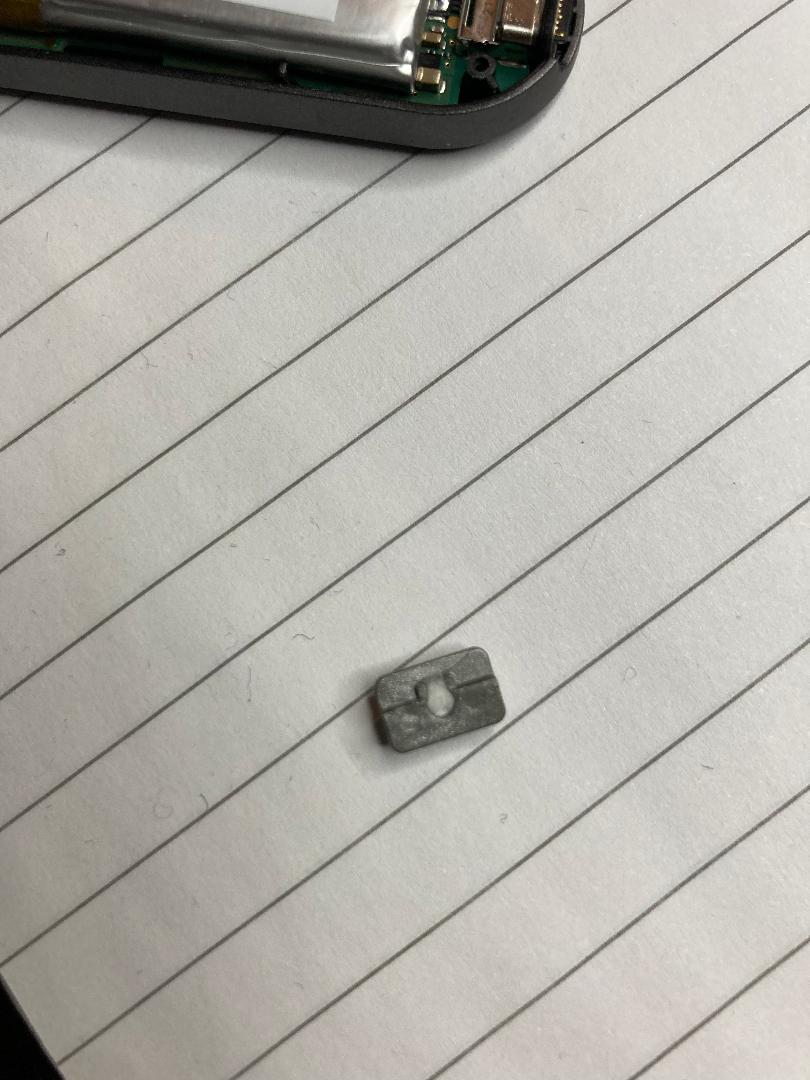
Here’s what the switch looks like when the external cover is pulled off and set to the side, and the internal switch is revealed.
Here it is with certain key sections highlighted.
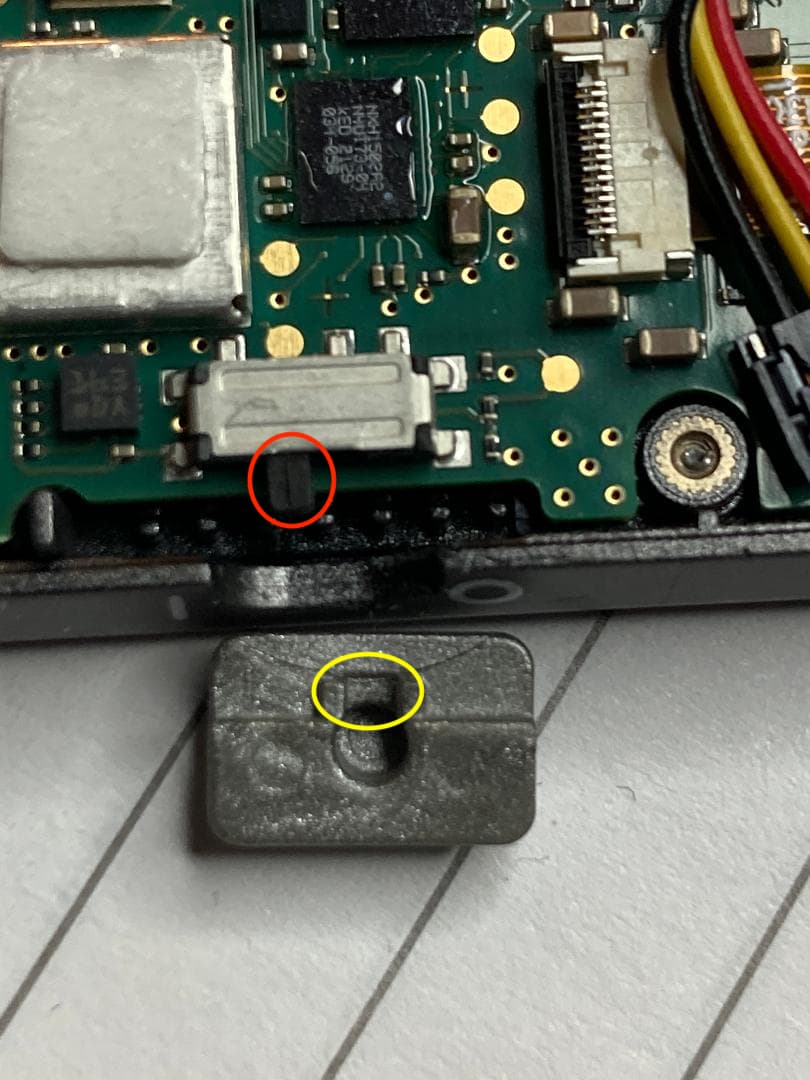
The tiny lever within the red circle is the internal switch. Flipping that back and forth will turn the device on and off, even while it’s disassembled, as long as the battery isn’t dead. This is a good way to verify that the innards work.
That lever should stay nestled within the channel inside the yellow circle. But if it gets knocked out of alignment, it ends up inside the larger hollow circle on the inside of the switch plate. That’s a problem, because there’s a lot of extra space in there, so pushing the external switch all the way to one side or the other won’t reliably push the internal switch as far over as it needs to go to turn the device on or off.
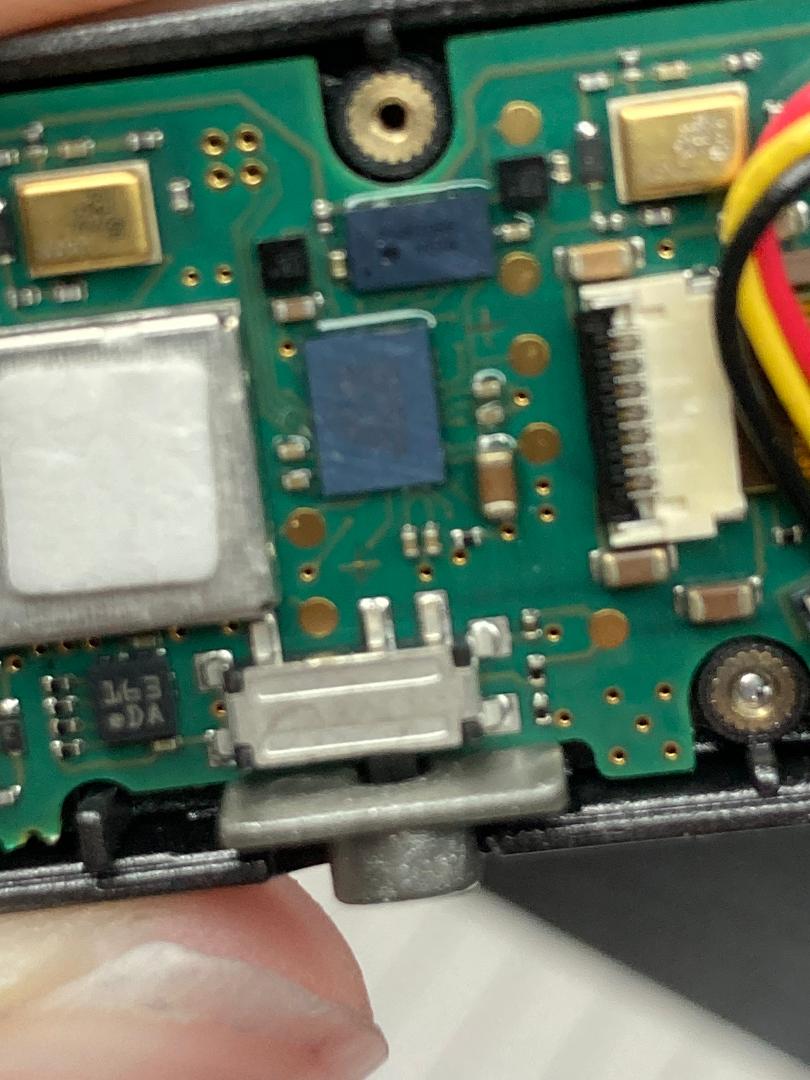
Sorry it’s so blurry, but it’s really hard to capture this level of detail with such tiny objects. Hopefully you can see the extra space to either side of the lever.
My initial quick fix was to pull some cotton off a q-tip, then jam it into the hollow circle as tightly as I could.
I fixed the first one that way. For the second one, I 3d-printed a tiny plastic cylinder that fit perfectly inside the hollow circle, and used rubber cement to glue it in place. Really, any way you can conjure up to securely fill the space should work here. This was done in December or January, and I’ve used one or the other at least weekly since then, plus had one or the other (sometimes both) knocking around in the bag I take to work every day. Both are still working perfectly.
I’ve never seen the inside of an On that didn’t have this problem, so I don’t know if this is typical. My best guess is that the ones being sold basically new but as-is for dirt cheap on ebay were offloaded by Phonak because this was a manufacturing defect. But without comparing them to a ‘normal’ one, I can’t be sure. All I can say is that I believe both of these were new, both came with two licenses, and both batteries took a good long time to die when I ran them down on purpose.
One of the sellers I bought from appears to have just gotten a bunch more in, if anyone wants to roll the dice on these. Just search for ‘phonak roger’ and sort by lowest price.
Feel free to post or PM me if you have any questions!
 I will also fix the rocker switch at the same time, probably with some foam, and let you know how the replacement battery goes…Cheers Kev